Pages

Showing posts with label DIY harry potter birthday party. Show all posts

May 23, 2016

DIY Magic Wands (for next to nothing!)

Want to know the best part about DIY-ing your own things for birthday parties??
Coming up with some awesome party favors that cost next to nothing!!!
Seriously, these were the easiest things I've ever put together.
They also turned out the coolest.

If you haven't been following & have no idea what I'm rambling on about, 
head over here to check out our most recent DIY birthday party that was all things Harry Potter. 
It was magical :) 

One of things that you just can't go without are magic wands. 
When thinking up different ideas for party favors, I was trying to steer away from edibles.
Mainly because we were having candy already mixed in with the party food & I didn't want to add to the dentist bills.
And with several big projects taking up our budget, I needed something that would be budget-friendly.

Cue the easiest magic wands ever. 
Oh, and the coolest. 


May 20, 2016

DIY Wizard Brooms

This tutorial is one of the one's I'm most excited about!!
I was pretty darn proud of myself with how they turned out- and they were the project I was most intimidated about! 
So we're going to talk about creating your own Wizard brooms today and on the cheap too :) 


May 19, 2016

DIY Harry Potter T-shirts (HTV tutorial)

If you follow me on Facebook or Instagram, you may have noticed a recent obsession with creating things with heat transfer vinyl. 
That's because... well. I'm obsessed. 

I tried my hand at it several years ago with some off-brand vinyl and didn't really love the results. 
So I just kind of held off on playing with it anymore until recently. 

My Silhouette and I have an on/off relationship where we will sometimes take long breaks from each other. 
Sometimes it's just necessary :) 

But we've been teaming up a lot lately and heat transfer vinyl has been at the top of my list of projects for the past couple months. 

When we were planning for the epic Harry Potter Party, I wanted to come up with some easy shirts that wouldn't cost a pretty penny. 

Here's what I came up with & I was pretty psyched with how they turned out...


Didn't they turn out cute? 
My favorite one was the "Straight Outta Hogwarts" one and all of them only took minutes to make!!
I'll walk you through the process the best I can. 
Heat Transfer Vinyl (HTV) can be a little intimidating if you haven't worked with it before. 
But once you have it down, it's the easiest thing ever. 
I'd rather transfer it to fabric than mess with transferring vinyl to wood any day :) 

First things first, 
create your design in the Silhouette Studio software and make sure you've measured your shirt to make it as big as you want. 
Once you have your design down, BE SURE to 'mirror' the image.
You can do this easily by clicking on 'Object' at the top of the screen, then clicking 'mirror'. 
This will flip your image so it'll be cut out in reverse, making it not be backwards when you iron it onto your shirt. 

After you've mirrored your image, cut it out using the vinyl specifications your machine tells you. 
Make sure you're cutting on the matte side of your vinyl- the clear plastic piece should be face down...
It's hard to get a good picture of it, but the picture below shows the machine cutting on the matte side: 


Once cut out, you should be able to flip your vinyl over and see the outline of your design through the clear liner. 
This is how you know your design cut out deep enough. 
Sometimes it's a little bit more faded but usually you can always see part of an outline through the back. 
Here's what mine looked like after it was cut: 


After you have it cut out, carefully weed your design. 
This is where I've found that the different brands you use make a big difference!
I've used the Siser brand (that you find mostly online at cheaper prices) and was completely underwhelmed by it. 
I've become a big fan of the actual Silhouette and Cricut brand HTV. Although it is pricier- so look for sales & coupons for it. 
I know many people have had success with Siser brands and I plan on trying it again now that I've learned a few tricks but for now, I've been using just the Silhouette/Cricut brands. 

After weeding, you'll want to prepare your shirt for transferring your image.
Make sure you iron is set to it's hottest setting (mine doesn't have set temps so I set it to cotton). 
Once hot, run your iron over the shirt a few times to pre-heat the surface.
I've found that this really does make a big difference in how the vinyl adheres to it!!

Then carefully place your transfer onto your shirt. 
You can adjust it a couple times if you do so carefully!


Tricks I've learned about applying your transfer: 

1. Preheat your fabric item before pressing your transfer onto it. 
2. When applying your HTV, press your iron down firmly on one area and count slowly to 30. Then move onto the next area. I wiggle the iron a little just so it doesn't just sit in one spot. 
3. After pressing FIRMLY for 30 seconds on each area, I run the iron over the whole item quickly one more time. 
4. Let it sit for just a few seconds and then carefully peel the plastic liner off. 
5. Once cooled, flip your shirt inside out and press the design from the inside of the shirt. 

And that's it!!
 

Like I said, it goes SUPER quick once you've done a couple and aren't so nervous about it. 
Unless you're just not nervous about it at all :) 

I LOVE how easy it is to transform plain shirts into something cute with HTV. 
And it's SO much cheaper than buying graphic shirts. 
Especially if you're wanting them personalized. 

Here's my cutie sporting her Harry Potter t-shirt...


And Little Man LOVED his Hogwarts shirt...


As far as washing/drying goes, I turn my shirts inside out to wash on normal cycle with like colors. 
But I do NOT throw mine in the dryer. 
I know many people that do and have good results but I hang-dry all my HTV shirts just to make sure they last a bit longer.
I've had a couple times where the design has started peeling but they were easy fixes. 

But now that I've gotten the hang of it, I've had zero problems with peeling. 

So if you haven't tried HTV, go for it!!
You'll be so glad you did!

I share a lot of my monogramming & HTV designs that I've done on my Instagram feed, so if you're not following over there, be sure to check it out! 

---------------------------------------------

For more details about the Harry Potter bash we threw, check these projects out: 


Like me on Facebook. Follow me on Pinterest. Subscribe to my feed
Pin It


post signature

May 17, 2016

DIY "Wax-Sealed" Harry Potter Invitations

Friends. 
The struggle is so real right now. 
Less than 2 weeks until school is out. 

Which means less than 3 weeks until work is done for the summer. 
The kids can feel it.
I can definitely feel it. 


And the end of the year has just been kicking my butt. 
So I'm hanging in there. 
But just barely. Anyone else in the same boat? 

I've been wanting to sit down and just pump out these last few Harry Potter posts so I can share some different projects I've been working on...and I just haven't had the energy.

So here's to hoping that getting this post out will inspire some sort of energy surge!

And, on top of the crazy work days & lack of motivation, my computer is running as slow as Christmas. 
Anyone else get incredibly frustrated when their machines are running like molasses? 

I digress. 

Let's talk Harry Potter invites.
Because I love coming up with fun invitations to set the tone for the party.

And with Harry Potter, there are so many ways to go about making fun ones. 

We finally decided to keep the invite itself simple and add some fun details to it to make it unique. 


And the best part about these invites is that it was something me and Little Man could do together. He actually told me that this was the 'best day ever' as we were working on them. 
Double points for getting him to do half the work AND enjoying it too :) 

Supply List
*Kraft paper sheets
-I purchased mine at Walmart. They were around $2 for 15 sheets of brown cardstock that were already cut at around a 5x7 size. Slightly smaller. But it meant NO cutting and no prep work for running these through the printer!
*Print Design (I created mine on Picmonkey.com)
*Twine
*Hot Glue Gun
*Red Sculpey Clay (one bar) 
*"H" Stamp


First things first, print your invite design out onto your pre-cut sheets of paper. 
If you didn't find pre-cut, go ahead and just cut the sheets to the size you're using & run them through your printer. 

If you'd like to use my invitation design, head over to this post to download the free printable for it. 
In my free printable invite, I left the details blank (times, dates, address, party type) so go ahead and add those details in yourself. 
Picmonkey.com is a free program that I use all the time. I downloaded the Harry Potter font and the Lumos font to use in my invite. Download these yourself and you can still use them in the Picmonkey program under 'add your own font'.

Once you have your printed invitations, go ahead and start working on creating your 'wax' stamps. 
If you haven't gathered by my crazy use of quotations marks, we are NOT actually using wax :) 
I didn't want to mess with the hot, messy stuff so I came up with this version. 
Easy enough for me and my 8 year old to do together. 


For the seals, gather your red Sculpey clay & your stamp. 
I used an "H" for Hogwarts. 
A regular rubber stamp would probably work better but I used the acrylic one I had on hand. 

Pinch off small pieces of the red clay, roll them into balls and then flatten them out. 
I didn't want mine to look perfectly round because they were supposed to be emulating poured wax- (Can I get a Hallelujah for crafts that don't have to be perfect?!?). 
Make rows of these on a cookie sheet. 


To get your imprint, simply push your stamp down into the clay, making sure it leaves an imprint underneath. 
I let Little Man do this part and he took it very seriously. 


After creating enough for your invites, pop them into the oven and bake according to the package instructions (they don't take long at all!). 

After they are baked, they'll be the perfect little addition to your invites!
Give yourself a pat on the back for creating your own crazy-awesome looking seals!! 

Then gather your supplies & actually put those puppies together.
This is where you'll need the twine, hot glue, the wax seals & your printed invites. 


Fold your printed invite into thirds, I made it so the two ends slightly overlapped each other, so it looked like a letter. 
Take your twine & tie it tightly around the invite, snipping the ends off. 
I pulled the tied part to the back of the invite so it wouldn't interfere with placing the seal. 
If they were real wax, they'd just cover the tied part & do its job. 
But hey, we can't all be as perfect as real wax. 

Take your faux wax seals and hot glue them to the front of your invite, where the overlap is. 
Then step back and look at that invite- it was practically made at Hogwarts!! 


We had so much fun putting these together- and Little Man loved handing them out to his friends at school and soccer. 
They may look expensive to do but most people will pay at least 5-10$, even if you're using pre-made cards & envelopes. 

All together, I spent about $10 for supplies (not counting the ink I used). 
Not too terrible considering how fun & unique they turned out!!


Didn't they turn out fun? 
And I know you're now dying to make some of your own wax-less wax seals, aren't you? 

Don't forget that you can get the free download for the invite here
And if you're wanting more fun ideas and pictures for your own Harry Potter party, I'd love for you to check out our version here

Here's to hoping that the next two weeks fly by (no pun intended) and that I'll get enough motivation to get the rest of these HP posts knocked out soon :) 

Happy Tuesday friends!


Like me on Facebook. Follow me on Pinterest. Subscribe to my feed
Pin It


post signature

May 09, 2016

Harry Potter Party FREE Printables and Source List!!

This is the best part about sharing any of the awesome parties I get to do...sharing all the fun printables that I created & used around the party!!

Besides sharing the pictures & details, this is my favorite!
Beautiful parties are all in the details and with free printables, those details can be super easy & simple to add!!


Today I wanted to share all the freebies that I created for my son's Harry Potter Birthday party that I shared a couple weeks ago. 
If you haven't had a chance to peek at it, I'd love for you to swing by and see all the printables in action during the party!!
Click here to be transported to all things Hogwarts :) 

For some of these prints, I'm providing the templates I used in several of my DIY projects, including the Hogwarts book spines & several of the Hogwarts labels that I used around the party. For these prints, I just printed them on regular white printer paper and then used my super easy DIY transfer method to transfer them onto the wood, paper or fabric that I was using for whichever project it was. 
Be sure to check out my DIY transfer method to see the how-to on creating these looks. 

This post is going to be on the lengthy side and full of pictures because I want to try and give you visuals for all the ways I used them :) 
Be sure to click on the links below each description to be taken to the download page. 
Do not just click & save from this post because the quality just won't be the same!!
At the very bottom of the post, I'll be sharing a list of awesome tutorials and links to other websites/blogs where I printed and used various tutorials from. I wish I could remember all the places I found but it was kind of a whirlwind as I was getting ready for the party so I don't have every single one. 
But peruse Pinterest if you're feeling stuck and you'll be golden. 

Here we go!!


No Party is complete without an awesome invite!!
I'll be sharing the how-to on these awesome invitations soon but for now, I will go ahead and give you the blank template. 
Download below. 


April 27, 2016

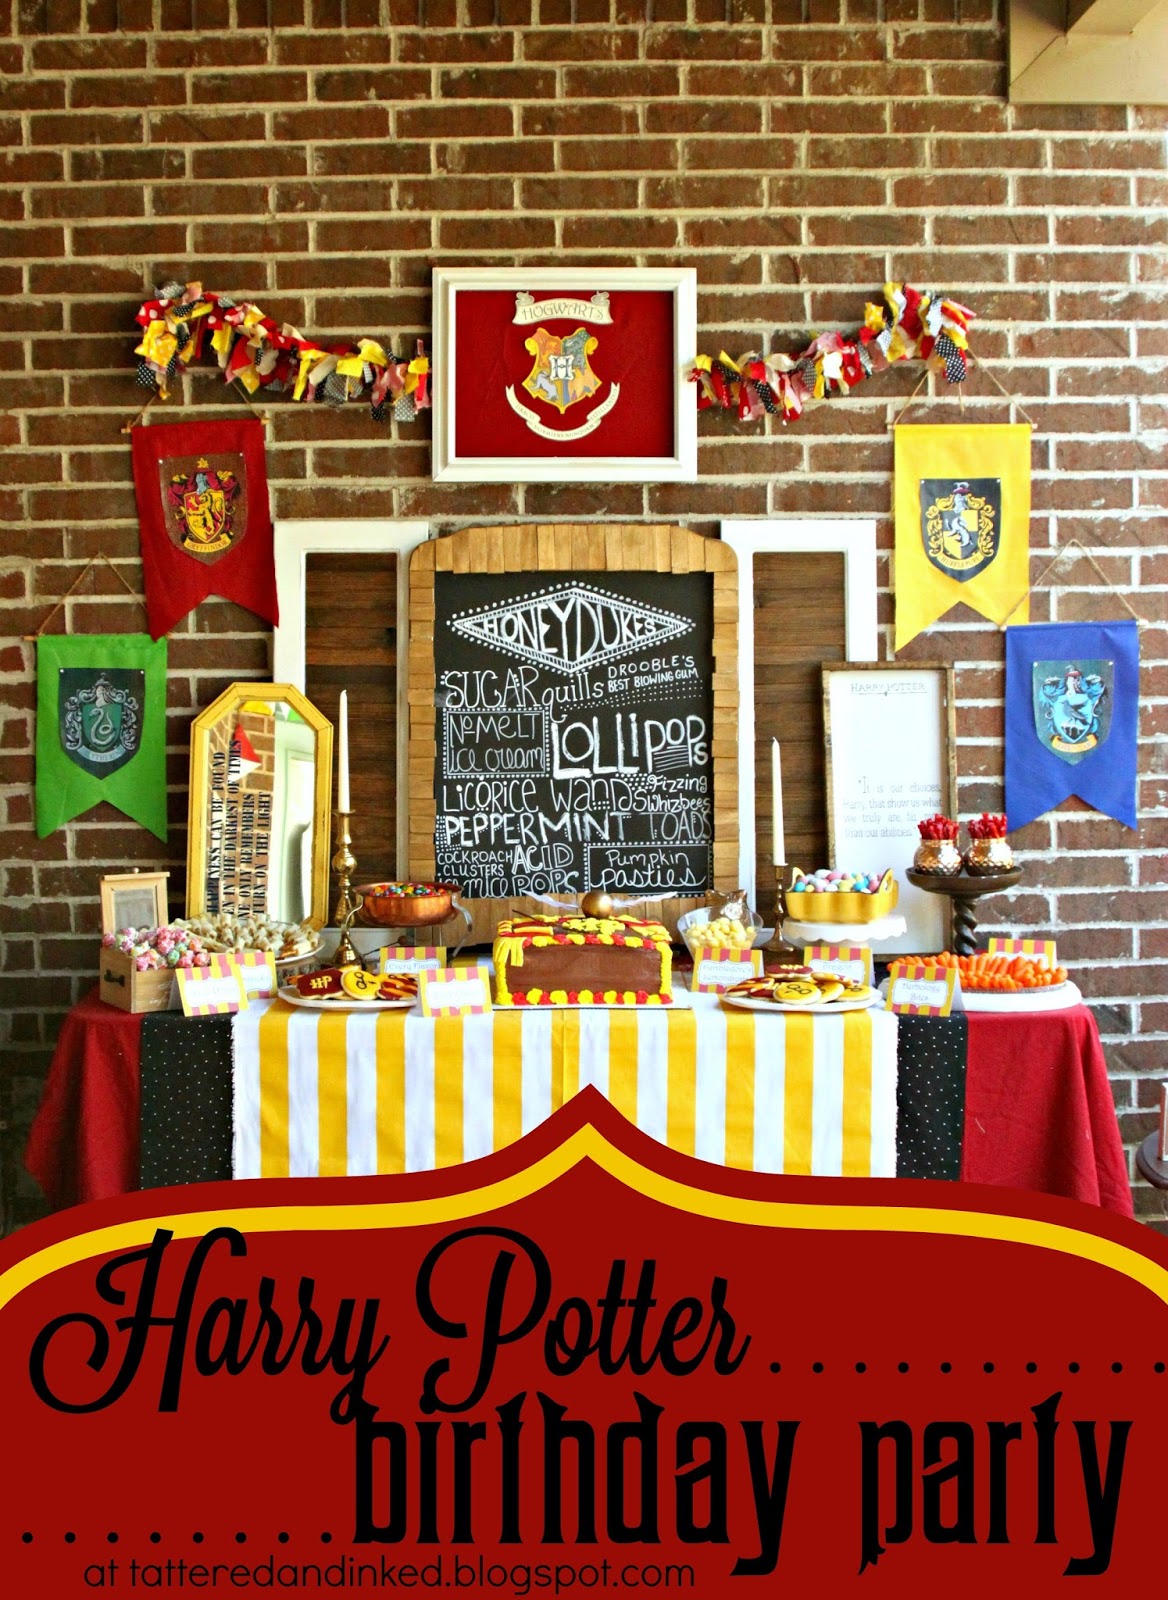
DIY Harry Potter Birthday Party

Eek! It's here!
I finally get to share the awesome-ness that I've been working on for the past two months!!!

If you follow me on Instagram, I've been sharing tons of sneak peeks to the Harry Potter birthday party I've been planning for my son. 
We have had an absolute BLAST coming up with things for it and it's by far my favorite party we've ever done!!

I'll be posting DIY tutorials and links to the various sites I used. I'll also be sharing the FREE printables of anything that I created for the party. So keep checking in. 

This post is INCREDIBLY picture heavy so hold on to your wands!!
Here goes nothing!!