Pages

▼
Showing posts with label Mod Podge. Show all posts

January 11, 2011

Baby Gift: Initial

So back around Christmas-time,
when it was super busy...
we decided to throw a baby shower for a friend of mine.

One thing that I'm kind of known for with baby gifts is personalization. I love giving things with the baby's name somewhere on it.
But they were still iffy about settling on a name.
They were pretty sure.
But not definitely sure.

But I had to do something with a name.
I got the sweetest chocolate brown and pink fluffy blanket (I love shopping for girls!!)
and I decided to throw a little personalized something into the gift...

I started with just a few things:

*scrapbook paper (her colors were soft pink and brown)
*An unfinished wood cutting board that I got somewhere on clearance
*Wood "B"
*Ribbon
*Mod Podge


It was super simple putting together.
I just painted the "B" and then applied paper to it with Mod Podge.
I then applied another sheet to the board (front and back)
I adhered the B with hot glue... I didn't want to put it on too permanantly unless they did end up changing their name.
I attached some extra paper and ribbon at the bottom.
I finished it off by tying the gorgeous ribbon through the hole until it was frilly enough.

What do you think?


It was super easy and turned out super, girly cute.


I love making things for baby girls...


I got my clear cellaphane out, settled everything into the middle then tied it up with more ribbon.


I also slid a ribbon slide I had that said 'sweet baby' onto the bow.


All ready to go.
Now if they'll just stick with the name :)

signature

Linking to:

December 20, 2010

Christmas Countdown Blocks Box

So I know it's a little late in the game.

But I love love how this turned out :)

Even if it, what, six days away from Christmas?

I've been seeing ca-ute christmas countdowns everywhere and wanted to make my own version and I so happened upon the perfect things while at Micheals one day.

I happened upon these unfinished wood blocks...


I knew they'd be perfect for countdown blocks.
I actually started out holing the bigger version blocks but then I found this cutie...


And the smaller blocks fit so perfectly into it...
See?


And the ridge on top of the box fit the blocks perfectly as well. Thus the project was born :)

I first took off all the shiny gold hardware and gave it a good coat of oil-rubbed bronze spraypaint.

Here they are before...


Then I took some of my new love- Polyshades stain and polyurethane in Bombay Mahogany (yum!)


I stained the entire box, inside and out and let dry.


Then I stained the sides of the little blocks.

I only did the sides because I then modge-podged squares of scrapbook paper to them!

Then stain just helped the corners pop and look a little more finished :)


You wouldn't believe the hard time I've had with finding numbers for these little pretties.
Micheals and Hobby Lobby apparantly are anti-numbers in their stickers.
I finally found some in my stash that worked.

Here's what you put on each block:

first block: 0, 1, 2, 7, 8, 9  (make sure the nine can double as a six)
second block: 0, 1, 2, 3, 4, 5

Then I did a layer of modge podge over them so they would last longer.

Here's the finished block:


And here are the sweet little blocks on top of their box:


I was in total, complete love.


For the front of the box, I used a scrapbooking label holder.
They were a goldy-glittery color that I brushed some blue paint over.
It still glittered :)

Then I printed out 'days til Christmas' on white cardstock and glued it to the back.
Then it was hotlued to the front.


I think it's a way cute addition to our Christmas decor :)


And little man loves to stack the blocks and see what numbers each day has.


Here's another set I did for a friend.
Except I used smaller numbers on it.

I like it either way but you know my thing about brown :)


And then they hide snugly away so they can be stored for next year!


Here's both sets:


I think they might be my favorite Christmas-y thing I've made this year :)


I set mine on the table by hubby's chair with my christmas tree painting I did several years ago.


So there ya have it.
My own Christmas countdown version.

...a little late...

So, c'mon there's still days left... pick some up and beaut-ify them! :)


signature


October 19, 2010

"FALL" Letters

Did you guys know that I'm a scrapbooker at heart?

That's where it all started anyways.

Random Fact: I worked at a scrapbooking store back in high school and got highly addicted to it. Most of my pay checks went straight there... I guess I can give credit to my craft-ism disease to that store :)

All that to say... I can't resist beautiful paper... just. can't.

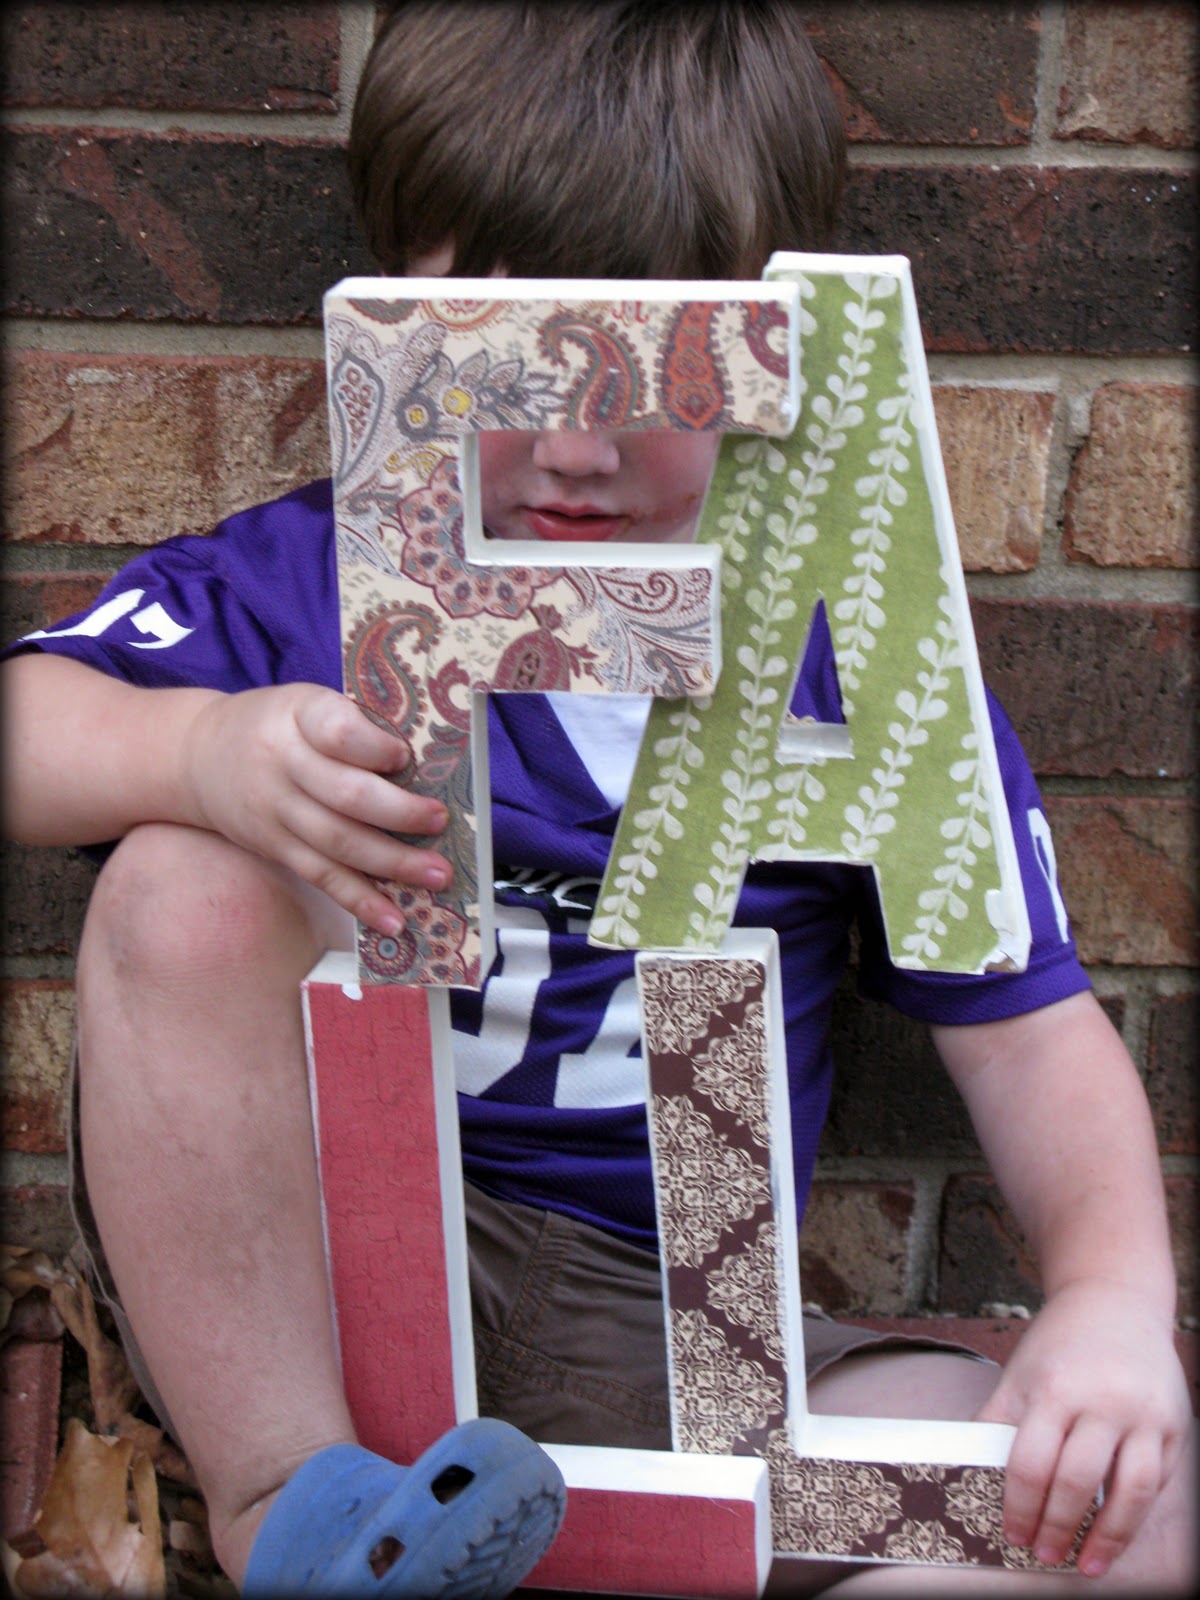
So I fell in love with some of the fall prints and they needed to be used. I grabbed some of those cardboard 3-D letters from Hob Lob, Modpodge and my exacto knife and set to work.


*Me and little man like to work in the garage... I don't worry so much about messes there...*

Have you guys seen this color by Folk-art?
Umm... Vintage White.
I have a ton now.
Thanks Folk-Art for giving me an equivalent to Heirloom White in a smaller package... now I can justify buying like five...right?


I took it and slathered it on the backs and sides of all my letters :)


Then I used my exacto knife and cut out the scrapbook paper around the letters.

A little bit of Mod-Podge later, and it's getting there :)


This was my attempt to glue these suckers together. I just wanted them to sit nicely on my mantle.

Little man would have none of that.
And after all my fancy rigging with the weight of the water bottles.
*sigh*
They ended up in two pieces...but no one can tell when they're sitting still.


Here's my tribute to fall in all scrapbooking wonder :)


I love all the colors and patterns :)

Little man did too.

Here he is representing my school jersey and our newest craft:


He told me that the L's looked better this way.
I have to admit, they look pretty good whichever way he was holding them.

Or maybe it was those baby blues peeking through them.


Either way, he let me have an impromptu photo shoot with our letters.
They were worth it if just for that.


I love fall.
And this little man.


So I can't decide if I'm showing off my letters or my little guy... either way... I hope you like 'em

:)


I hope you guys have a fabulous week.
OT school is cut to three days this week since our FALL break is here :)
See all the reasons to love fall?
School even stops for it.
And nothing stops school.

I plan on enjoying this little man AND fall for a few relaxing days.

I'll leave you with my favorite picture:


Enjoy your fall, ya'll.
(couldn't resist my arkansan ways)

This Project was featured on:

UndertheTableandDreaming

signature

Linking up too: