Has this week just flown by or what?Maybe its just because I have a million things to do and want time to go slower so I can get it all done...
that's gotta be it.
I came home from one of my class OT observations yesterday and crashed.
I felt awful.
I think I fell around around 5 and didn't get up until this morning.
Hubby was sweet to take care of me :)
But it's set me behind in the post schedule I had in my head- haha.
Darn life getting in the way!
Later this afternoon I'll be showing you yet another before/after of one of the pieces from my master room redo.
And it was dramatic :)
But for now I wanted to share some easy repurposed items I did.
One of my main goals in the room was to use things I already had and either just paint them or use them in new ways.
So these two guys are the result of sticking with that goal:
Aren't they fun??
And they were so easy to fix up and make them look brand new for the new room.
Here's the quick run-down on each of them...
Weathered Wood Art:
This piece started as just a regular plaque.
I think I picked it up at a flea market a long time ago.
It had been hanging in the old room by it's ribbon and I was tired of it...
Here's a not-so-great picture of it before:
I took two little pieces of hardware I had lying around and used them to hold the two pieces of wood together.
I liked how the bracket pieces looked so I kept them on the front.
Then I literally just hot-glued the plaque to the front of the wood pieces.
This way I can always take it apart fairly easily if I want to change it up.
I'm in LOVE with how it looks now that it's backed with the weathered wood.
A nice & super easy way to update pieces you already have!!
Next onto the
Belt Rack
These little peg shelves have to be everywhere!!
I always see them at garage sales and Goodwill so they would be super easy to find.
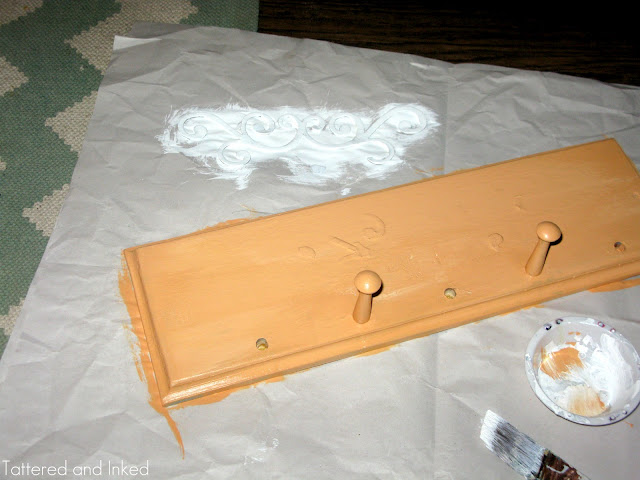
I've had this one forever and it was actually one of the first painting crafts I ever did!
I loved the blue & brown but it needed to match the room so it needed a quick facelift.
I decided I wanted to give it a bit more of a modern twist, so I yanked three of the pegs out and swapped them out with these cute knobs from Hobby Lobby.
Hubby filled my Christmas stocking with all kinds of fun knobs :)
He's the best!
Then I used the same tangerine color from my stenciled wall on the shelf.
I peeled off the chipboard applique (it did NOT like coming off)
and painted it white.
You can see some of the residue left over on the shelf from where I pulled it off but I was going to be putting it right back so it didn't matter.
Otherwise, a good sanding would have taken that off.
I glued the applique back on, attached the knobs and it was ready to hang out in the new room with it's new colors :)
I use it to hang all my belts from
and in the winter/fall, a lot of scarves hang out here too.
I adore my 'Love' print from MadeByGirl that hangs above the shelf too.
She was one of the first blogs I ever read so it's special :)
I think one of the hardest things about redoing a room is feeling like you need to run out and get a bunch of new things to get that 'new' look.
My advice is just to take everything off the walls & try to look at them in a new light.
Can they be painted?
Is there a different way it can be used?
What could be added/taken away that would make it fresh?
Or just go shopping in the rest of the rooms in your house.
Sometimes just switching things up from room to room can make an area look brand new!
The four pieces of wall art below were all in the room before and even just hanging them in a new way made a huge difference.
Here's where each of them came from in case you were wondering:
Cabinet Door Quote: Made by me
Chandelier Canvas: Hobby Lobby
Wooden Plaque: Flea Market/ Repurposed by me
Metal Love Frame: Hobby Lobby
Do you ever shop your own house for a new look?
I'll be back later today with a fun furniture before/after.
Hope you guys are having a great week!!!


No comments:
Post a Comment
Reading your comments makes my day!!! I'd love for you to leave me some love and make me smile :)