Pages

September 30, 2011

Updating Your Fireplace (without touching your brick!)

or stone...or whatever else your fireplace is actually made of.

Cuz this easy update only has to do with one thing...
it's removable and totally easy to update from blah (or just ugh) to fan-lovely-tastic!!

I'm talking about this little monstrosity:


I know some people totally embrace that brass but it literally was sucking the life out of my narrow living room.
The whole fireplace was dark and the brass faceplate just immediately drew your eye to it...and away from my lovely blue walls and pretty little mantle :)

Something had to be done.

See what I mean about just sucking the life out of the room?
It stuck out like a sore thumb...


The fun part was getting the thing off.
Who knows how long it had been stuck on that fireplace?
Trust me, it was kinda gross when it finally let itself become unstuck.
I vacuumed for quite a while. Ick.

Though it was a sight to see Hubby halfway into the fireplace with his drill trying to pry the thing off.
I really hope Santa doesn't come down that chimney...shudder.

So he finally decided to cooperate...


Some of my lovely followers commented during my fall mantle week saying that the perfect solution was High Heat Paint!!

We must have totally been on the same wavelength cuz this was my last summer project back in August.
And I totally used that amazing high heat paint by Rustoleum.
So I was right there with ya, guys :)

This stuff is awesome.
Not too terribly pricey and it made my nervousness about painting something that liked to flirt so close with fire.
I love to curl up next to our fireplace during the winter with a book...I'd rather not have any scary explosions, you know?

Turns out after doing a bit more research that the flames don't actually get near enough to the faceplate for it to really matter.
It does get warm, but not enough to become flammable.
And I was only painting the outside, not the inside part that attaches to the fireplace anyhow.

But just to be safe...check this stuff out :)


I, of couse, stuck with a pretty white since it's right next to the kitchen and all our new trim is a fresh glossy white.
It took several coats to get it even but it looked amazing...I had a hard time waiting for it to dry :)


I taped newspaper onto the glass to keep them from getting painted.
And then, right after it was done drying, hubby forgot to bring his drill home from work.
Lame.
So it sat for like three days before he decided he'd stick his head in the fireplace again to re-install it.


And here he is looking all glamorous in his new white coat!!
You can't even know how much of a HUGE difference this made in our living room.
It seems so much more fresh and alive :)
And it completely makes me happy to see the fireplace now.

And...he's sporting new ORB handles.
Uh oh, Watch out.


I love having our exposed brick so painting that was never an option.
But this was such an easy fix and it's never looked better :)
No really...it couldn't have looked good in the sixties either.
It was meant to be a glossy white color!

It's hard to tell in the pictures, but there's some great detailing punched out along the top that looks so much better in the white than it did in the brass.
Easy, peasy fireplace update.

Gotta love an update that comes in a can.
I mean, what are they going to think of next?
Welp, the glitter spraypaint just came out so, seriously, what can top that?
Oh yes, Krylon...Rustoleum...Valspar...that would be a challenge.

Top glitter spraypaint?
Silly spraypaint companies... :)
They think of everything.


What do you guys think?
Need to run & update your fireplace now??

Is it fireplace weather where you are?
Arkansas is still in the 'can't get out of summer' phase and I'd welcome some cool-ish weather if anyone is taking orders :)

Happy Friday ya'll!!
...Have a fabulous weekend...


post signature

Linking to:

September 23, 2011

Fall Mantle Reveal!!

Ack!! It's finally Friday and I''m so excited!!!

Not only does that mean I finally get a break from classes (but sadly my research paper will be with me all weekend...) but I finally get to show you my Fall Mantle!!
I've been dying to share it with you guys.
Mostly because it's pretty much completely epic to me.

Not only did I change what's on top of the mantle...but several little things on the actual structure changed that made a HUGE difference.
Can we even say it enough?
{Paint makes all the difference in the world}

I've been showing you sneaks all week about some of the decor going on it ...
so I can't wait to show it to you all put together...
this is where you hear the drum rolls, peeps.

Ready?

Go!


I decided to go with brighter fall colors this year.
I added a few splashes of my aqua I love along with the traditional oranges and browns.
Add weathered wood and some wheat...and it's saying 'fall' all over :)


My 'Clover Hill Farm' sign fits in perfectly :)


And remember my sneak peek from yesterday?
I told ya there was some loveliness hidden in there.

I added a pretty coat of gloss white and gave them a good sanding.
I love the different heights of each of them- they're so purty together :)

I hung my glitter wreath from a thumbtack I put in the tallest door.


I'm so excited with how it all came together.
It's amazing how much your style can change in a year.
Last year was pretty sad :/

This year... well, I'm not sad I took down my spring decor anymore.


The weathered wood adds just the right amount of rustic charm to balance out the white and glitz.


I found this awesome antique Clorox bottle at my favorite antique store a few weeks ago.
I thought it'd be perfect for throwing some wheat in.
That amber color is perfect for fall :)

Although the opening to the bottle was smaller than I expected so I couldn't get in as much wheat as I was hoping.
But it still looks pretty together. Win.

The number is a random mailbox letter that I got at the same antique store.
I got a whole stack :)


My little H pumpkin is sitting on a plate with a couple of my cute Hobbly Lobby pumpkins surrounding it.
That awesome disc is some sort of antique cover that I found for 3$.
I couldn't resist it for some reason.
Love the typography. Love the old wood.


My favorite part is all the layering.
The glitter gourds and farm sign help add to that :)


I really was nervous about taking my spring mantle down but now that I see everything together,
I totally don't regret it.


I"m loving how light and fresh everything looks.
Especially with my chevron rug :)
I'm still loving that summer purchase.

How do you guys like all the cars piled into my blue vases on the hearth?
Just keepin' it real, guys.


Just for a good reference point,
here's the side by side of what the mantle has always looked like and what it looks like now.
See the epic change now?


See what I told you about not just the decor changing?
I also painted the fireplace faceplate and added some much-needed molding around the whole mantle.

Don't worry, I'll be sharing how I did the faceplate soon :)
So easy, guys.
And it made all the difference in the world.

What do you think?
Fall-worthy??


**I'd love to see your beautiful fall mantles or mantle inspiration. Jump over to my Facebook page and share them there!!!**

post signature


Linking to:
Remodelaholics Anonymous @ Remodelaholic
Sundae Scoop @ I Heart Naptime
Sunday Showcase @ Under the Table and Dreaming
Amaze Me Monday @ Ditttle Dattle
Craft Catwalk @ Embellishing Life
Mushki Loves My Stuff @ Mushki Loves


September 21, 2011

A Fall Wreath that Sparkles...

I am so glad to be able to say that it's finally halfway through the week.
This week has been a tough one.

But luckily it's Wednesday,
I'm still plugging along.
And our huge research paper draft deadline has been pushed to next week.
Yay for professors who care :)

So it gives me time to share my sparkly fall wreath that I've been wanting to show you guys!
I told you I had one other glitter project I did on that crazy glitter-filled weekend when I brought the Glitterblast spray home.

This one is super exciting to share because it's a little unique in that it might just be the cheapest, easiest wreath ever.
Really.

All you need is:
*Wreath Form
*Glitterblast Spraypaint
*Scraps of fabric

I got a styrofoam wreath form from Hobby Lobby,
it's the smaller size and just the plain, ordinary white styrofoam form you normally see...


and then I took this magical stuff...
(the orange color)


and literally sprayed it right onto the wreath form.
No primer needed.
This stuff stuck like a charm.

White styrofoam to glitzy gorgeousness.


I added a few burlap and linen flowers along with a pop of blue...
and a few rosettes in the middle of those.


To hang it, I ruffled a strip of burlap and pinned it to the back of the form.


I love my little glitzy wreath and the longest part of making it was waiting for the paint to dry.
Gotta love that.


Have I convinced you yet of the gloriousness of glitter in a can?
Check out these projects if you need more convincing:
&

And I mean, painting styrofoam to be this pretty?
Must be magic :)


What do you think?
Are you liking a little bling added into your fall?


I'm loving sharing bits and pieces of my fall mantle with you guys.
I have one more piece to show you tomorrow and then the big reveal on Friday :)

Can't wait!!

I'd love for you to share your fall mantles or any inspiration pics you've stumbled upon on my Facebook page!
Head over there and start linking them up :)


post signature

Linking to:

September 19, 2011

Jenga Block Vintage Farm Sign

How was ya'lls weekend?
Mine was the usual- had a girls night Friday night when hubs and little man were out, hung with the fam on saturday...and sunday I played catch up on homework since I'm such a good little procrastinator :)

I also, maybe, might have messed around with my mantle some more.
On my FB, I told you guys that I got all my fall decor out last week and decorated.
I also got my mantle 'done' which doesn't mean much because I knew that the next few weeks would be spent tweaking it here and there.

Do you guys do that too?

I'm just proud that I got it done because I was having a hard time breaking down my spring mantle.
I loved it just a little :)

But it's time for something new and, of course, fall-ish!

Thus...


And it's going to have to be the most epic mantle makeover for my little mantle everrrr.
Because he not only got a facelift as to what's on top of him, but also a facelife in general.
As in, a lot has changed :)

I'm so excited to show you but the grand reveal will have to wait til the end of the week...
but every good reveal needs a before pic so here's the spring mantle in all it's glory...


*Funny Fact: I hate that brass faceplate on the fireplace so much that when I did my post on my spring mantle, I never posted a full photo of the fireplace- it always got cut off right above that- lol*

So much has been done to make the fireplace look happier and brighter :)

But today I'm going to show you a little piece that went on the fall version of my mantle.
If you've followed me very long, you know I have a slight love affair with vintage signs.

So when I saw this mantle on Pinterest I was head over heels in love.
If you go to the original post, you will die over how beautiful all her fall decor is.
Seriously.

And I just adored her little farm sign.
She actually found that little beauty and since Arkansas has a serious shortage on cute vintage farm signs, I decided to make my own.

A friend of mine had brought a ton of beautiful wood from an old wooden fence over to make bookshelves and she gave me the scraps that were left over :)
(You know that's a sign of a life-long friend!)

So I had these gorgeous pieces of weathered wood:


It was already perfect for what I needed to recreate a hand-made sign :)
Love it when that happens.
I gave them a good sanding, but decided to leave them their original coloring.

The tops of the fence wood were cut at angles which made it even better.
I laid four of them next to each other and secured two pieces of 1x4s along the backs with nails.

Voila. I had the startings of a fun sign.


Now I had to figure out how to do the lettering...
and what lettering to do.

Me and hubby threw all kinds of ideas out- I knew I wanted it to be a farm sign so we were trying to come up with something clever.
Hubby ended up liking 'Clover Hill Farm' the best so we went with that :)

I adored the raised lettering in the inspiration sign and really wanted to recreate that.
But I wanted them to look rough-hewn and hand-made.
No chipboard or painted letters, please.

I love it when things just catch your eye that are perfect with a capital P!
I had another box of Jenga blocks from my Jenga Block Baby Gift and knew they'd make the perfect raised letters!!!

I quickly laid them out...


So perfect.
So excting.

They were exactly the look I was going for.
Although I had made the boards before making the words so they were a little big.


Nothing my miter saw couldn't take care of though.
Just go nice and slow cuz you certianly don't want a Jenga Block thrown violently at your head :)


Much better.
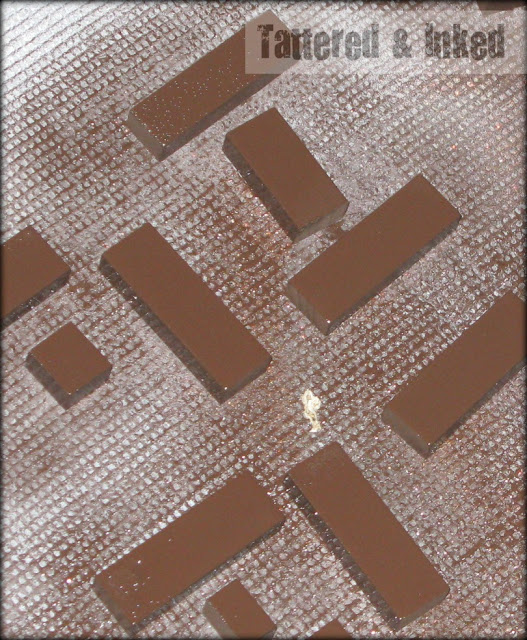
I gave them a quick coat of Espresso Brown and tried to patiently wait.


After my patience had worn thin, I grabbed my Crackle Spraypaint (which is also what I used on my crackle pumpkin!).
I love this stuff- I've never had luck with the bottle kind of crackle paint, but this stuff is amazing.
Pretty crackles every time!!


See??
 Perfect, gorgeous crackles.
Swoon.


I used my nail gun to nail them onto my boards... and absolutely loved the result!


I love the hand-made look of it.
And I was so excited to achieve the raised letters :)


Aren't Jenga Blocks amazing??
Betcha never knew they could look so pretty!


And, of course, I had to set it up for a photo shoot :)


What do you think?
Do you need your own vintage farm sign too???


I'm in love with my new sign.
And it's not all faux- vintage...considering that the weathered wood is completely real :)

I'm so excited about showing you the rest of my mantle decor,
I hope you'll stop by every day this week to check in!!!

Tomorrow, I have an easy way to dress up your pumpkins,
and Wednesday is that other glitter project I've been telling you about!

Happy Monday, guys!!
(if there is such a thing...)


**The Giveaway with the Paper Clouds shop ends TONIGHT! Get your entries in here**

post signature

Linking to: