Pages

▼

January 31, 2017

{Sharing the Love} Day 2: You're My Person Print


We are back at it again today friends!!

Day two of Sharing the Love week is here!!


Any Grey's fans around? 
Then you'll have a particular love for this one :) 

We say this to each other all the time and it always rings true. 
But it's also perfect to share with a bestie too so you can print it out and fold it into a sweet card to bring a little happiness to their day! 

Either way, it's a great way to spread a little love. 


Click below to download your free print: 


If you're stuck on how to use printables, here are a couple ideas I've done in the past...
-Print & frame (the most common)
- Print them smaller and stick them in a lunchbox, dash of the car, etc for a sweet note
- Print them and cut them into different shapes for cute banners- I've used them in the middle of paper banners with pattern papers around them. 
-cute tags for gifts


Happy Tuesday friends! 

-----------------------------------------------------------------

Need more Valentine's ideas?? 

Get the incredibly simple how-to on making this darling V-day banner here: 


Check out my DIY Valentine Dinner that we do every year here: 


Have a Pokemon lover in the house this year? 
Check out these adorable, free printable valentines to be the coolest mom around!


------------------------------------------------------------------

Printables are intended as gifts for Tattered and Inked readers only.
As with all my free printables,
these are for personal use ONLY.
Please do not claim them as your own or alter them.
For a complete list of all my free printables,  head to this page. 


Like me on Facebook. Follow me on Pinterest. Subscribe to my feed. 
Pin It


post signature

January 30, 2017

{Sharing the Love} Day 1: All of My Stars Print

Welcome back to my most favorite series of the year!!!

I"m talking about all things Valentines and some super amazing FREEBIES for you guys ALL week long!!
If you haven't been around for very long, every year I host a week of free Valentine prints that I've created just for you guys! 
It's my absolute favorite!!

So welcome to {can you believe it?!} the SIXTH annual "Sharing the Love: A Week of Valentine Printables"!!!


I'm definitely a word lover so quotes just seem to stick with me. 
I LOVE this quote & the romance behind it so I knew it'd be perfect to kick us off on our Sharing the Love week! 

And watercolor is just my favorite right now- those peach and pink tones are perfect to add into your Valentine decor!!
For a little different spin, print it out on watercolor paper to give it a more realistic look & throw in a bit of texture. 


Click below to download your free print: 


If you're stuck on how to use printables, here are a couple ideas I've done in the past...
-Print & frame (the most common)
- Print them smaller and stick them in a lunchbox, dash of the car, etc for a sweet note
- Print them and cut them into different shapes for cute banners- I've used them in the middle of paper banners with pattern papers around them. 
-cute tags for gifts


Hope your week starts off wonderful! 
See you tomorrow for our second print of the week!!

-----------------------------------------------------------------

Need more Valentine's ideas?? 

Get the incredibly simple how-to on making this darling V-day banner here: 


Check out my DIY Valentine Dinner that we do every year here: 


Have a Pokemon lover in the house this year? 
Check out these adorable, free printable valentines to be the coolest mom around!


------------------------------------------------------------------

Printables are intended as gifts for Tattered and Inked readers only.
As with all my free printables,
these are for personal use ONLY.
Please do not claim them as your own or alter them.
For a complete list of all my free printables,  head to this page. 


Like me on Facebook. Follow me on Pinterest. Subscribe to my feed. 

Pin It
post signature

January 23, 2017

10-Minute Valentine Garland (with free cut file!)

I'm baaaaa-ck!!
Have you guys missed me as much as I have missed you??

I can't begin to explain my absence- nothing life-altering has happened. Life has just been busy beyond belief lately. 
I'm hoping to slide back in and get started on some fun new posts and projects for you guys. 

I WILL tell you that I'm already prepared for my absolute favorite series during the year- "Sharing the Love- A Week of Valentine Printables" WILL be happening this year. Be on the lookout- coming verrrry soon.

In the meantime, I have a super simple, super cute garland to share with you guys that I literally threw together in about 10 minutes. 
And I'm making it even easier on you guys by sharing the cut file too!


Isn't it darling?!

Here's all you need to make one of your own:
*Fabric in various patterns
*Heat Transfer Vinyl (I used black & red glitter)
*Iron
*Scissors
*Glue Gun
*Twine or string


To start, gather your fabric (perfect time to scour your stash!!) and iron your pieces flat. Cut out as many banner pieces as you need to fit the length you want. 
I did a variety of sizes, mainly because I loved the black &white fabric and it was more narrow than the rest.

Cut your garland pieces, iron them flat. 


For the middle piece, I made mine bigger than the rest to be the focal point. 
Make sure you cut your fabric piece first so you know how big to size your vinyl design. 

Go ahead and iron & cut your middle piece. 


After making your middle piece, size your vinyl design accordingly. 
I've made this part super easy for you by providing the same design file I used!
Click here to download it and use it in your Silhouette Software. 

I used black & red glitter vinyl for my design but feel free to mix up your colors to go with the fabric you chose.

Cut your vinyl design out, weed & then iron it onto your middle piece of the garland. 
Make sure to watch your layering :) 


After you've cut all your pieces and adhered your design, lay the pieces out in your desired pattern. 

Use hot glue to attach to twine/string. 


Can you believe how easy it was?!?


Duck cloth & linen are also great neutral fabrics to use in the middle if you aren't wanting white. Although any solid or lightly patterned piece will do great!!


They make the perfect photo backdrop or easy addition to your Valentine decor. 
I'm sure this one will be making an appearance at our annual Valentine's Day Dinner at Cupid's Cafe this year!!

I'd love to see yours if you end up throwing one together!!
Leave me a comment or share it on my Facebook page!!

Who else loves an easy, super cute project to throw together?!? 

Happy Monday, friends!! 


Like me on Facebook. Follow me on Pinterest. Subscribe to my feed. 
Pin It


post signature

December 19, 2016

"O Holy Night" Christmas Mantle

I guess it's about time I finally get some Christmas up on the blog, huh? 
It's been harder & harder lately to get any free time to blog which has made me feel pretty lame lately. 

But here I am!

I was super excited about decorating for Christmas this year since last year was a 'just get up what you can' type of year since we had just moved in!
I had time to actually plan out what I wanted this year. 

I won't keep you in suspense for long, lovelies. 
Here's my simple but pretty Christmas mantle this year: 


I always love having a large centerpiece for most of my mantles and this year was no different. 
I knew right away the shape I wanted but couldn't decide for the life of me what quote or image I wanted to put on it. 

Then I stumbled upon this image on an amazing Instagram page I happened to stumble upon (thanks Pinterest!) and knew it was the perfect lettering for my sign. 


(Image via Louie Dahlquist, on Instagram here) 

I asked his permission to use the design for tracing onto my sign & he graciously said yes!
It was PERFECT. 


The sign was made from reclaimed barn wood from my sister's house- we have a whole stockpile of awesome wood & I'm in heaven :) 

I created the shape onto paper to make a template for hubby to cut it out. 
We left the old barn hinges on the bottom because...how could you not? 


After creating the sign, I gave it a nice coat of a bright red I had on hand, then brushed some black & white paints into it for a more worn & layered look. 

Then I used the hand-lettered design, blew it up & handpainted it onto the sign. 
Gorgeous, right? 


I've had the DIY fabric trees for several years now & they're still holding up great! 
They were perfect for flanking either side of the sign. 


The stockings & garland were all DIY projects from a few years ago now too. 
I still love our simple burlap stockings!! 


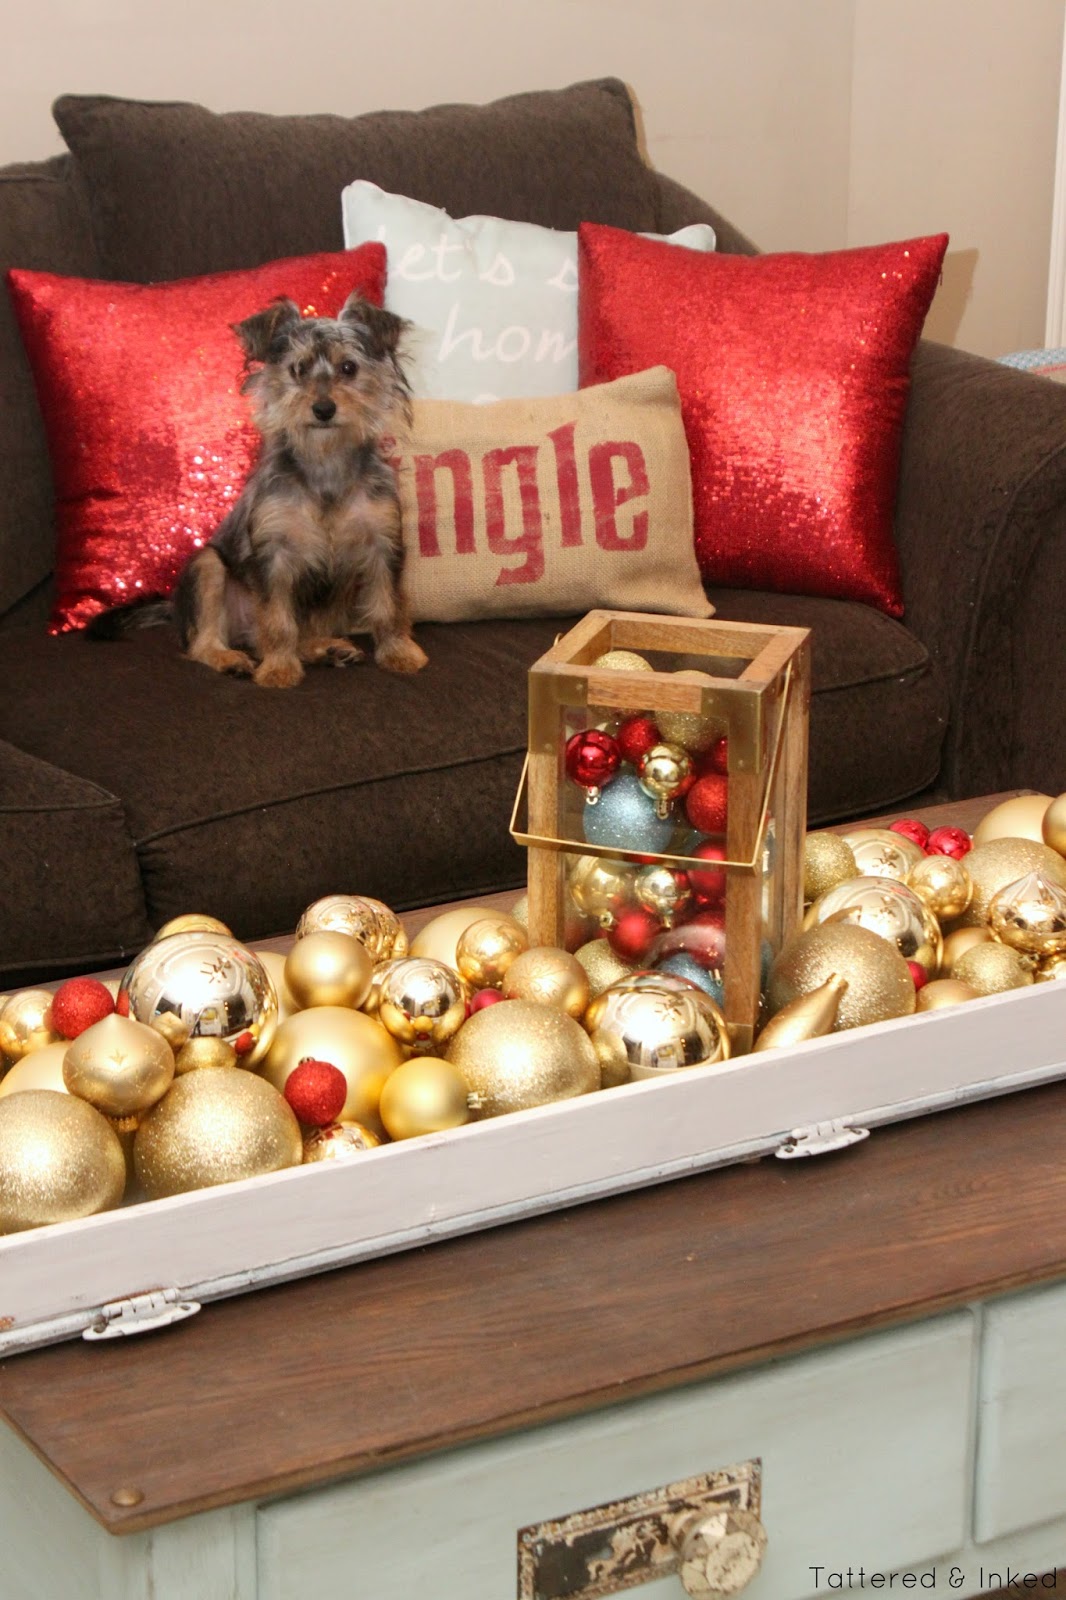
One of my favorite simple additions this year was filling a tray that I created from an old cabinet door & scrap wood with heaps of gold & red ornament balls. 

The tray was built for the dining table but was exactly the right length to fill up the coffee table. The gold ornament balls were under $8 for all of them at a local discount store. The gold lantern came from the same discount store for $10. Gotta love simple & cheap :) 


The "Merry Merry" Burlap pillow is a DIY pillow cover I created from a Christmas sack that one of my gifts came wrapped in last year. 
Perfect for lounging fireside. 


Although pictures were few & far between this year, I snapped a couple of the front foyer just to share with you. 
It's the world's hardest place to get a good picture but I just love all the aquas & reds together!!


The red burlap wreath is my most favorite DIY project this Christmas (besides the mantle sign!) and is so easy to do!
I love how full & colorful it is. I added a birch deer head that I bought from our local Holiday House this year. 


I love Christmas decor with all its sparkling lights & pretty colors- snuggling up on the couch with the Christmas lights on & a cup of hot tea is my all-time favorite feeling!

I hope you are having a magical Christmas holiday season!
Details for all the pictures above are found below if you're curious :) 

Merry Christmas friends!


------------------------------------------------------
Item Sources: 
(Living Room) 
O Holy Night Sign: DIY by me, hand lettering design here
Fabric Trees/Wooden Snowflake: DIY by me
Gold Snowflake on stand: Hobby Lobby
Stockings: Kohls, embroidered by me
Garland: DIY
Coffee Table Tray: DIY
Gold Ornament Balls: Target
Lantern: Target
Coffee Table: DIY

(Foyer)
Twas the Night Before Christmas Sign: Holiday House purchase
Fabric Trees: DIY
Wooden Tree: TJ Maxx
Gold Votives: Dollar Store
Aqua Mirror: Thrifted and repainted
Red Burlap Wreath: DIY
Merry & Bright Sign: DIY
Wood Octagon Mirror: Target
Golden Reindeer: Hobby Lobby
Wooden Snowflake/Baby It's Cold Outside Mirror: DIY


Like me on Facebook. Follow me on Pinterest. Subscribe to my feed. 
Pin It


post signature

November 14, 2016

Fall Mantle 2016

I know, I know, I'm on the late side of things with this post. 

Butttt in all fairness, I just plain decorated late too. 

I only got this up a few weeks ago...because it's been so darn hot around here that it hasn't felt fall enough to pull out the pumpkins. 

So I finally just told myself to get to it!

Here's what I came up with in this non-fall feeling fall around here...


I went with lots of neutrals this year with pops of my favorite blue & gold tones. 


Do you see my excitement over the new Gilmore Girls revival episodes showing through??
I just knew we needed a Stars Hollow sign to grace the fall decor this year so I came up with this fun sign that resulted from an 'oops' during another project. 

I'll be sharing a bit more on it soon- I love the rounded shape vs a traditional square or rectangle sign. 
I tweaked the original Stars Hollow blue to be more in my light, minty blue. 
And, yes, it'll find a permanent home somewhere after fall decor goes back up. 


I used my favorite and super simple technique to make a quick wreath in my favorite mustard color that you're seeing everywhere this fall. 
I kept it simple and didn't add any contrasting textures to this one.
See the tutorial on how to make one here. 


The rag garland has been around a couple years now and it's still my favorite. 
Love the gold, oranges and burlap together. 

The mirror was a $3 Goodwill find a few years ago. I taped off stripes and just spraypainted the mirror to have those gorgeous white stripes. 
I use it everywhere. 
It stays in my 'party room' where all my extra decor hangs out & it gets pulled out often. 
It's the perfect filler piece :) 


I made the rustic frame on a whim from some leftover barn wood I had from another project. 
The chewed up piece was destined for the trash pile but I just have a weird love for chippy, broken pieces. 
It made the perfect chunky frame to add some chicken wire & a wreath to. 


The only other smaller pieces consist of found wood slices, chippy banister candlesticks and thrifted copper ones. The pumpkins are both from the Dollar Store!!
Goes to show you don't have to go broke to create something pretty :) 


I added the "Come Thou Fount" framed print from HL this year because this song has just been sticking with me lately. 
We all need a good reminder of where our blessings truly lie. 


All in all, this whole deal cost me around $25. 
I used a lot of things I already had on hand or created projects from scraps of previous projects (the wood frame, Stars Hollow sign). 
The only things bought were the Come Thou Fount print, the mustard fabric and the little gold pumpkin. I call that a huge success :) 

I hope you enjoyed my little fall set-up. 
I'll be sharing more details on the Stars Hollow sign soon, so stick around! 

Happy Monday sweet friends! 


Like me on Facebook. Follow me on Pinterest. Subscribe to my feed. 

Pin It


post signature